Here are some decorative pillows I've made recently. The yellow one is made from a section of my baby quilt that my Mom made for me when I was a baby. The appliqués are a little worn, understandably, so I had to repair/restitch some of them down again. good as new :)
Thursday, April 10, 2014
Baby Toys
Here are some soft baby toys I've made recently. I designed the patterns myself and I added a jingle bell inside each toy to create a rattle (the plush stuffing muffles the harsh sound of the jingle bell into a more soft rattle sound).
This cute little cloud guy is "raining" little sensory tags and can be tied to a crib or stroller etc.
Here's another bunny rattle I made for a friend of mine who is expecting a little boy :)
And here's the whole gang :) you may recognize the jackalope from this post. I decided to give him nose and mouth.
Sunday, April 6, 2014
Baby Quilt
It's finally finished! My very first quilt! (small baby-sized quilt that is). I'm pretty happy with how it turned out :) it has its imperfections here and there, but I'm okay with that. Gives it character, right?
and of course, my cat couldn't stay off of it...
I also really like the fact that many of the blocks have special meaning or memories:
1) a fabric that I've had since I was a child and had just started sewing (around 7 years old)
2) a piece of yellow flannel taken from MY baby quilt that my Mom made for me when I was a baby! many eons ago...
3 & 12) floral print fabric I got while on a trip to Mexico
4 & 6) quilt blocks made by my aunt for a different project that she didn't end up finishing so she gave them to me :)
5) a piece of flannel with little animals on it from MY baby blanket
7) a couple fabric scraps that my sister gave me that belonged to her boyfriend's grandma
8) a few different fabrics I got while thrift shopping with my sister
9 &11) pieces of a bunting that my Mom made for my wedding
10) a piece of fabric from a dress that I bought while garage sale-ing with my sister
and this piece was also taken from the baby quilt that my Mom made for me when I was a baby. I then added the embroidered "Love Mommy". <3
Saturday, February 22, 2014
Sneak Peeks!
Here's a few sneak peeks at what I'm working on next :) A simple crochet blanket...
....And my very first quilt!
Lots of work ahead of me!
More Baby Crochet Projects!
These cute little Baby projects are super fun and really quick to make! Both these hats were made using this tutorial.
And this adorable little cardigan was made using this pattern.
Pink Baby Hat
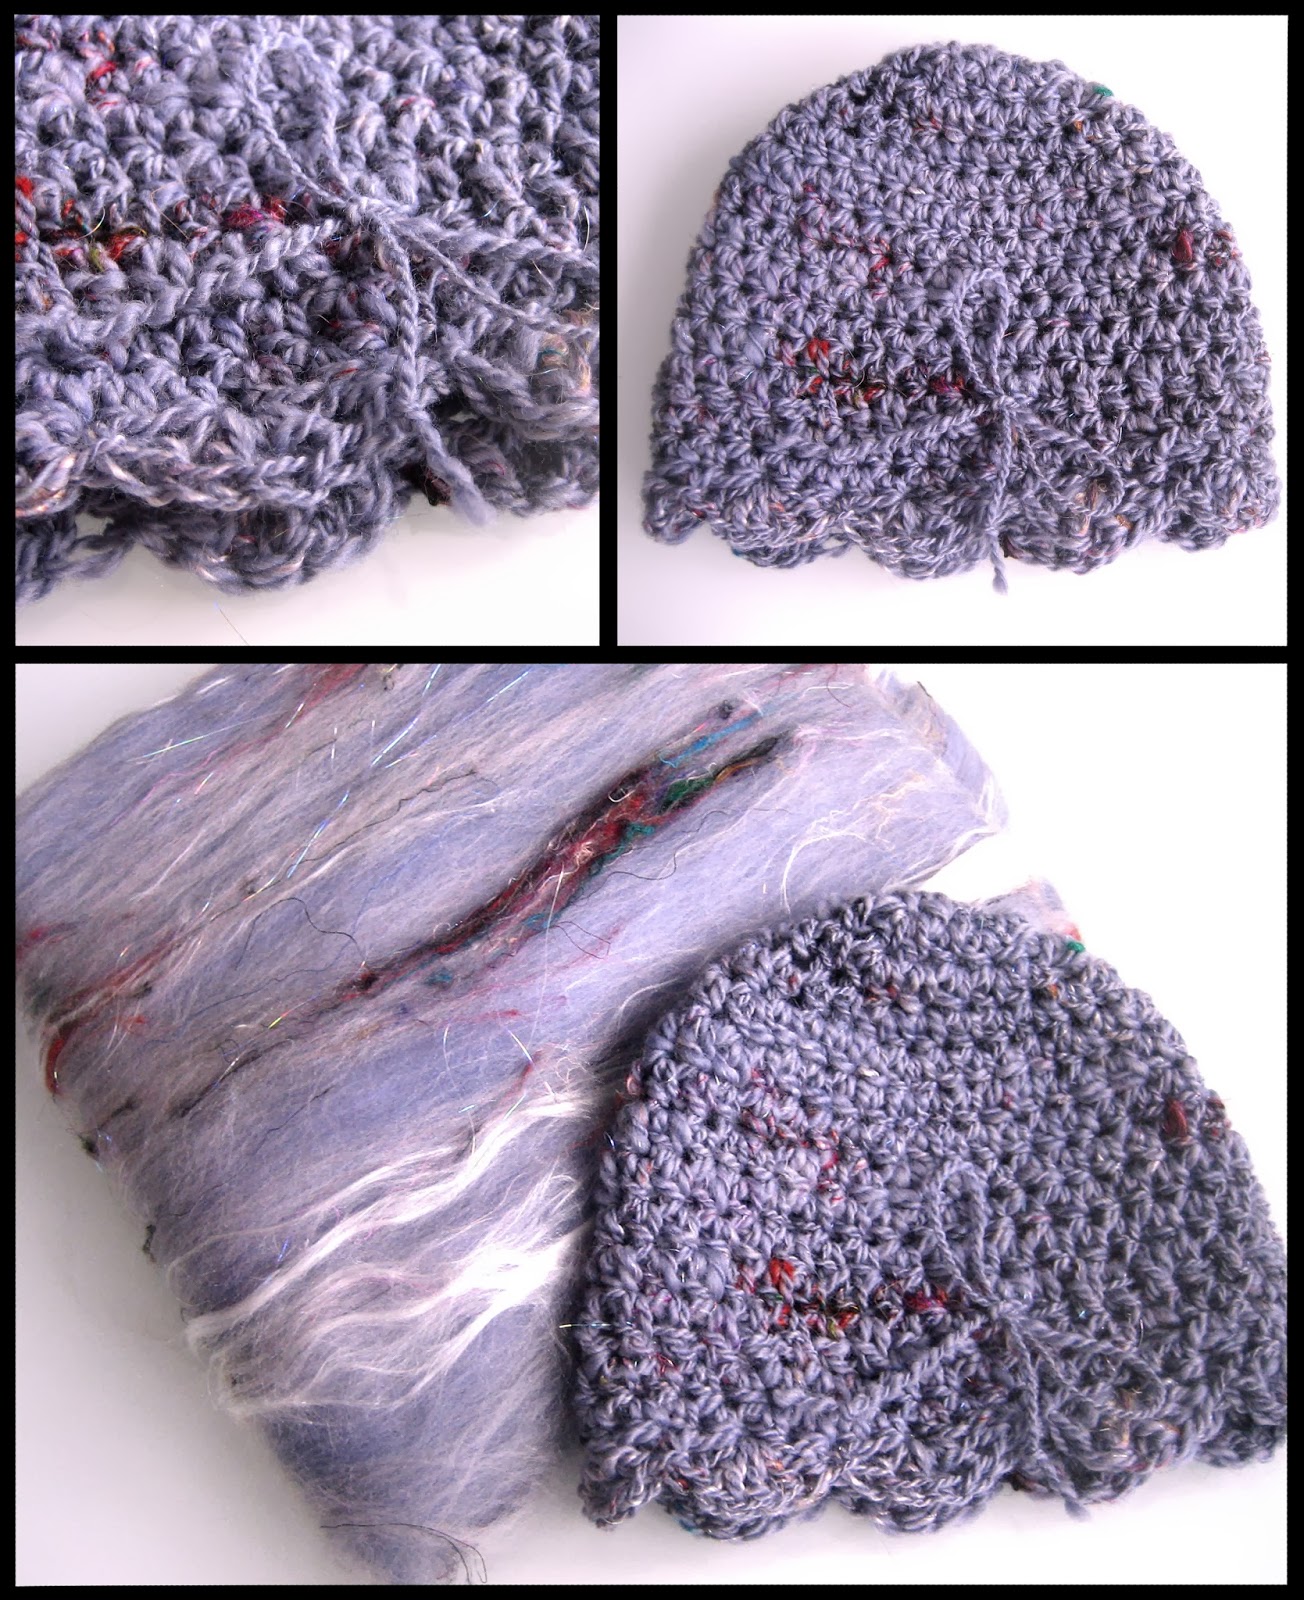
Remember that yarn I spun up from a few posts ago? Time to make something with it! I find baby projects ideal for these small skeins of yarn because they're so tiny :)
I spun this lovely fibre (which I got from Winding the Skein) and plied it on itself.
This pattern is SUPER simple (which I found here) and works up really fast!
Necklace Hanger
I finally got around to making this MUCH needed necklace hanger, as all my necklaces were constantly getting all tangled up with each other in my bathroom drawer for ages! I made this with a bunch of materials that I scrounged up from around the house (yes, that's a real branch from outside, wrapped with yarn, a few S hooks and a ribbon).
I like how it turned out :) functional and cute.
Felting!
So here's the product of the sneak peek from a few posts ago....felt! I carded some alpaca fleece of varying colours that I had lying around which was too coarse for spinning. Once the colours were all blended they turned into this nice warm grey :)
Saturday, October 12, 2013
Moar Yarn!
So here's a collection of some more yarn that I've spun on my drop spindle since my first skein in this previous post.
However for most of these skeins, I didn't hand process the fleece myself. I bought the batts from winding the skein and expertly dyed: art by science, both on etsy.
The greyish one you see does include some hand processed (by me) alpaca fibre carded together with some green and blue roving.
I've also been experimenting with spinning different thicknesses of yarn, from a bulky/chunky weight like the pink ones, to a more fine weight like the lavender one. So addictive!!
Upcycled Suitcase Cat Bed
Here is the finished cat bed that I wrote about in this previous post!
My sister got me this vintage suitcase last Christmas after hearing me talk about wanting to make one of these adorable cat beds.
I picked up some furniture legs (and painted them a nice turquoise colour to match the accents on the granny square "quilt") and hardware from Home Depot as well as a piece of wood to reinforce the bottom of the suitcase.
Belle is slowly starting to like her new bed :) (obviously my labour of love will always lose to any cardboard box...go figure)
My next project is proving to be a pretty long one....
Here are a few sneak peeks:
Can you guess what I'm making?
Friday, July 26, 2013
Courtney's EPIC YARN Post
Well, here it is! My Epic Yarn post :) This is the story of how I went "from the farm, to the yarn!". Hand processing fleece into yarn from scratch is something I've had on my bucket list for a long time, so when I discovered that a local alpaca farm, Magpie Hill Alpacas had advertised for volunteers to help with their annual shearing I jumped at the chance, and of course I signed up right away!
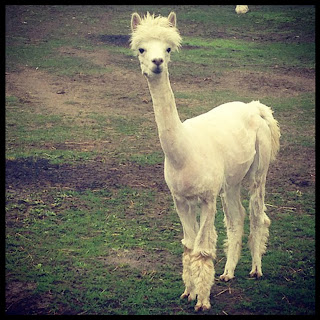
It was such an amazing experience! I got to meet the alpacas and learn all about how the shearing process is done.
The alpacas were so sweet and inquisitive! Look at their cute little faces :)
With a sample of the raw fleece that was shorn that day in hand I rushed home to start my endeavour.
~~~ STEP 1: Washing ~~~
I know that many people spin alpaca fleece without washing it, as it doesn't contain lanolin the way that sheep's fleece does, but I wanted the full experience so I decided to wash mine for good measure. The tutorial that I used was this one that I found on youtube.
I rinsed each batch 3 times and as you can see in the bottom right of the picture above, after 3 rinses the water ran nice and clear.
Then after a gentle squeeze, it was out into the fresh air to dry.
~~~ STEP 2: Picking ~~~
After the fleece had completely dried, it was time to hand pick the fibres. Below is the result of picking, which I found many tutorials on youtube for, including this one. This video uses a picking "machine", but if you're like me and don't have one, you can certainly just pick the fibres apart by hand....it just takes a little bit longer.
The fleece quickly became super fluffy and soft! and you can see how much whiter it is now, compared to the raw fibres before the washing process.
~~~ STEP 3: Carding ~~~
After much searching in Ottawa, I finally found some hand cards for sale at Wabi Sabi, a really cool yarn/fibre arts store close to down town, and got to work. There are a TON of carding tutorials on youtube so if interested, you can just search there, as I found a combination of videos to be pretty helpful. It seems as though everyone has their own sort of "style" to hand carding so, after watching several of videos I sort of got the general idea of it and then kind of came up with my own "style" that worked pretty well.
Hand carding results in something called a "rolag" (those fluffy, sausage-like things you see above) and most people will then spin right off the end of the rolag. But I wanted something longer and more continuous like roving, so after some google-ing I found this great tutorial on how to turn rolags into roving, through something called "dizzing" where you pass the fibres through a very small opening such as that of something like a large button, which is exactly what I used. Worked like a charm!
By splitting the ends of the rolags in two, then sort of merging or blending them together, and then passing it through the button, I ended up with one, long roving to spin with.
~~~ STEP 4: Spinning ~~~
I also got this drop spindle at Wabi Sabi, and got started on my first hand-spun yarn.
There are also a TON of tutorials on youtube for spinning on a drop spindle, but a few of my favourites were this one and this one.
After a bit of practice, I started to get the hang of it, and really started to enjoy spinning! It's actually pretty addictive, so watch out!
~~~ STEP 5: Plying ~~~
This step is optional, but I wanted to do it to create a softer, loftier, more balanced yarn. While you can ply the "single" yarn on itself, I decided to use some embroidery thread to create a more delicate effect.
When plying, you want to spin onto the drop spindle in the OPPOSITE direction that the single was spun, in order to make them "twist" together.
~~~ STEP 6: Setting the Twist ~~~
After the yarn is all spun up onto the spindle, to finish your yarn and turn it into a skein, you need to wind it off the spindle and set the twist of the yarn so that it "stays". By winding the yarn around something like a chair back (or a niddy noddy if you have one - which I don't, haha), and then tying some thread in a figure 8 pattern around the yarn in a few spots (which is shown in the video), then soaking in some warm water and hanging with a weight of some sort at the bottom, it removes any excess twist that you might have in the yarn, and sets the twist. This step helps the yarn relax and hang straight, and keeps it from bunching all up on itself. This tutorial was great for this step.
And Voila! after it's all dry, you have a lovely skein of yarn, ready to use!

Tada!
~~~ STEP 7: Use your yarn! ~~~
The sample of fleece that I brought home only yielded about 27 yards of yarn, so I had to be a bit creative in deciding on what to make with it. I had also bought an a skein of yarn at the Alpaca farm when I was there (which is a lovely caramel colour, made from one of their very own alpacas and processed at a local mill), and combined it with my hand spun yarn to make these cute fingerless gloves.
I found the pattern for the heart here, and for the rest I just sort of "winged it" as I couldn't find a granny heart pattern that I liked. And here's what I ended up with! You can't imagine how incredibly soft and luxurious these feel!!
~~~~~~~~~~~~~~~~~~~~~~~~~~
Thanks lady Alpaca, for your lovely, fluffy fleece!
Subscribe to:
Posts (Atom)


